In the following article, we are going to take a look at the best screen printing machines for beginners, so you find the right one!
If you’re already looking for such a machine, you’ll have in mind perhaps a small business idea, or you may just want one to use for yourself. If you’re reading this to find out more about screen printing, before we get into the actual reviews, let’s talk about why you might find a screen printing machine useful.

The 5 Best Screen Printing Machines – Reviewed!
If you’re serious about screen printing then you do need a machine. We’ve picked a few of the best available, so here are our reviews.
1. Vevor Screen Printing Machine


The purpose of a screen printing machine is to make the process easier. This one does, but it would appear from numerous customer comments that it is what becomes before using it that is the major problem! Clearly, it is quite difficult to put together – it requires home assembly – and the instructions that come with it are poorly written, even being described as ‘unreadable’. There are also reports of screws missing, so check carefully.
Having said that, this is a four colour screen printing machine – it has four plates on which you can mount individual screens to be used one after the other – so is good for more complex images, and it is made from top quality materials. It is also compact compared to some other machines we have used, and many customers have commented on the professional standard results.
Ideal for t-shirts, if you take the reported issues as being easy to overcome, this is a machine that does the job at a decent price, so deserves its place on our list.
- Four colour machine
- Large size platen
- Metal construction not easy to assemble
- Compact
- Not easy to set up
- Good price
2. Schzond Screen Printing Press

This four-colour screen printing press is very similar to the one above. In fact, it could even be the same machine under a different brand name, and it is also the same colour. It has very similar sized platen – 17.5” x 21.5” – which in printing terms equates to A2 size. It also uses the same four-arm spring system, and is mounted in an identical fashion.
Customer reviews of this one are remarkably similar, too, with many users complaining about the assembly being difficult and the instructions being hard to decipher. Notably, some disagree, saying that if you follow the pictures you get the idea, but it’s not an easy machine to assemble. Others say it is ideal for beginners, and comes at a sensible price, and we can’t disagree with that. If you’re happy to take some time building the machine, it’s worth looking at.
- Four colour machine
- Large size platen
- All-metal
- Not easy to assemble
- Sensibly priced
- Good for beginners
3. Techtongda Four Colour Four Station

As with many items we review – in particular the more specialized ones – there is a theme emerging here in that this one is also very similar to the two above. Perhaps we should not be surprised as the design of a screen printing press cannot vary that much, given it has to perform a very particular job. This one is also blue, but comes with a black stand that can be attached to the floor to make it free standing.
It has the usual four sprung arms, each with its own platen table of the same size as the above – that’s A2 – and the stand can be adjusted in height to make things comfortable for different users. The arms are double-sprung and fully adjustable, too, and it is recommended by the single buyer who has reviewed it. We like it, and it is designed for beginners, so it deserves its place on the list.
- Large size platen
- Adjustable base unit
- Double sprung
- Four colour press
- Designed for beginners
4. Techntongda 6 Colour 6 Station

Although similar in design and principle to those that we have reviewed above, this one has one distinct difference; rather than being a four-colour press, it can handle no fewer than 6 colours in 6 different stations in one go. The maker’s description does say that this means it is best used by two operators at a time, but also that it means it can push out as many as 50 6-colour t-shirts in one hour if the operators are skilled.
It’s an all-metal design complete with an adjustable base, six sprung arms and large size A2 platens, and it too has only one review, which gives it four stars. If we’re to be honest, it’s perhaps too complex a machine for the true beginner, as it does need a second operator for efficient running, but it’s still worth looking at, especially if you are getting the hang of screen printing and want to make more complex prints.
- 6 colours
- A2 press
- Adjustable base
- Two operators
- Perhaps a touch complex
5. Manual Cylinder Screen Printing Machine

Now for something completely different! The above four machines are distinctly designed for printing t-shirts and other fabrics items such as cushion and furniture covers and garments. What if the item you want to print on is a cup or – very popular these days – a bottle, or other cylindrical item? In that case you need one of these, which is designed specifically for the purpose.
It is a single colour machine that will print on cups and mugs, bottles and pens, and anything of that shape. It’s nicely made from strong metal, and designed to be easy to use. It has fully adjustable clamps and other essential parts for printing on the required items, and is able to print an area of up to 40x45cm, which is plenty for items of this shape. The single customer review touches on old ground – it’s hard to assemble and came with no instructions – but it’s the only one we know of suitable for beginners.
- For cylindrical items
- Single colour
- Won’t do t-shirts or fabric
- Difficult to assemble
- Claimed easy to use
- Fully adjustable
That’s our pick of the five best screen printing machines for beginners, but which is for you? Let’s see if we can give you an idea.
Our Choice
The choice here comes down to what you want to print: t-shirts, fabric and other flat items, or cups, mugs and bottles?
If it’s the latter, the only choice for you is the Manual Cylinder Screen Printing Machine which is the sole model designed for printing on cylindrical items. It should be said there are few of these designed for use by beginners, so this one is a good pick.
If you want to print t-shirts, hoodies, and other garments, fabrics and flat items, we recommend that you take a closer look at the Vevor Screen Printing Machine. While it suffers the same problem of its competitors – being difficult to put together and having no decent instructions – it does the job to a very high standard, produces professional level prints, and is a sensible price for a four colour machine.
Our Buying Guide
Many people use screen printing machines as a way of printing designs onto fabric. You may have – or be looking to start – a business that prints bespoke t-shirts, cushion covers, or any other items made from a wide variety of products. The best way to imprint an image onto fabric is using a screen printing machine.
It’s not a difficult process, yet it will take some time for you to get used to how it works. A screen printing machine is one that uses a mesh ‘screen’ to imprint the image on the fabric. The screen can be used many times, and prints a single colour – we’ll come back to this in a little while.
The screen is painted over using special paint, and the image you wish to print is then ‘cut out’ using very powerful lights. This creates a stencil, which is then used to print the image onto the fabric, as many times as you wish.
One of the major benefits of this method of printing is that the image stands out from the fabric; it doesn’t fade in as it will in some other methods. Back to the single colour issue: if you are printing in just one colour, you only need to create one screen. If you are producing a multi-colour image, you will need to make a frame for each colour.
Screen printing is labour-intensive, but it can also be fun, and if you find the right business idea, can also be profitable. So, whether you are in business or an artist looking to produce your work this way, our screen printing machine review should help.
Before we talk about the machines, let’s have a look at what else you will need to start screen printing.
What You Need to Start Screen Printing
You need, obviously, the machine, a screen and a frame, but in addition to those items, you will also need to invest in the following to start screen printing:
- Emulsion and sensitizer; these are the substances used to cover the screen to create the image you need.
- 250 watt bulb and suitable adjustable lamp, which are used to ‘cut out’ the image.
- Silk screen fabric ink, which is used to print the image.
- Transparency paper for printing the image
- A squeegee
Now we could list a number of other things you need, such as gloves – it’s a messy process – some card to keep the fabric flat when printing, and of course the fabric you want to work with! What we do recommend is that before you commence printing on your t-shirts, for example, you practice a lot on waste fabric to the get the technique right (we’ll talk a little more about the actual process below).
One other very important factor is that you will need a perfectly black room. A closet is a sensible idea – or a blacked out garage – but it needs to be absolutely black, and also have enough room for you to move around in.
So, let’s have a more in-depth look at the process involved in screen printing.
How Does Screen Printing Work?
Screen printing follows the same idea as stencilling: you block out the areas you don’t want to print, and the others are left clear. As we recommended above, start by practicing on old or waste fabric and with simple designs.
The first thing you need to do is draw or create your design. There are many software options you can choose from, or you can simply use Photoshop, with which you can create a silhouette that will be perfect for the purpose. The silhouette must be black in order to create the right result.
When you have your image, you cut it out using transparency paper. This is thin plastic that you will have seen, and is available in many forms. A craft shop will be able to help you select the right paper.
So, now you have your image and you are ready to start printing. The next step is to coat the frame. We mentioned emulsion and sensitizer; these are substances you will be able to buy at the craft supplies store, and once again they will be happy to advise you on the right ones.
The emulsion and sensitizer should be mixed as per the instructions on the containers, and then – with the screen flat on the floor or other flat surface and something beneath it to protect from the ink – pour as much as you need onto the screen and spread it to cover a little more space than the image you are creating.
It now needs to be left for a couple of hours in the dark to set, at which point you’re ready for the next step!
Exposing the Image
You’re now at the stage where things start to get creative, and it’s worth noting that they may also be a bit confusing in the early days. This is why we recommend you practice plenty before you start printing properly.
Now, before you start, you need to make sure you have your screen and the frame positioned on the flat surface, and your powerful light ready to go. Place the image on the now-dry coating, and use masking tape to keep it in place. The screen goes face-down on the frame.
Next, you need to place the lamp between one and two feet from the image, and with no other light in the room, turn it on and leave it for around 15 minutes. This causes the sensitizer to react and ‘burn’ the image into the emulsion. Now, remove the transparency: what you should see is blue lines where the burn has taken place.
Now, if you can see the blue lines – holding the screen up to the light might help – you need to wash the excess off using simply water. The areas you don’t want printing will fall away, leaving you with your transferred image!
We know it’s difficult to follow in words, so we recommend you read as much as you can and also check out videos, or perhaps see if there is a screen printing class or demonstration near you that you can attend.
Next, you’re ready to print!
Printing the Image
Now for the fun bit – printing your image! Make sure the screen is dry, and black out any areas that do not have emulsion on them with masking tape. Lay the item you want to print on out on a flat surface – let’s say it’s a t-shirt – and place the piece of card we mentioned earlier inside to stop the ink from transferring to the back.
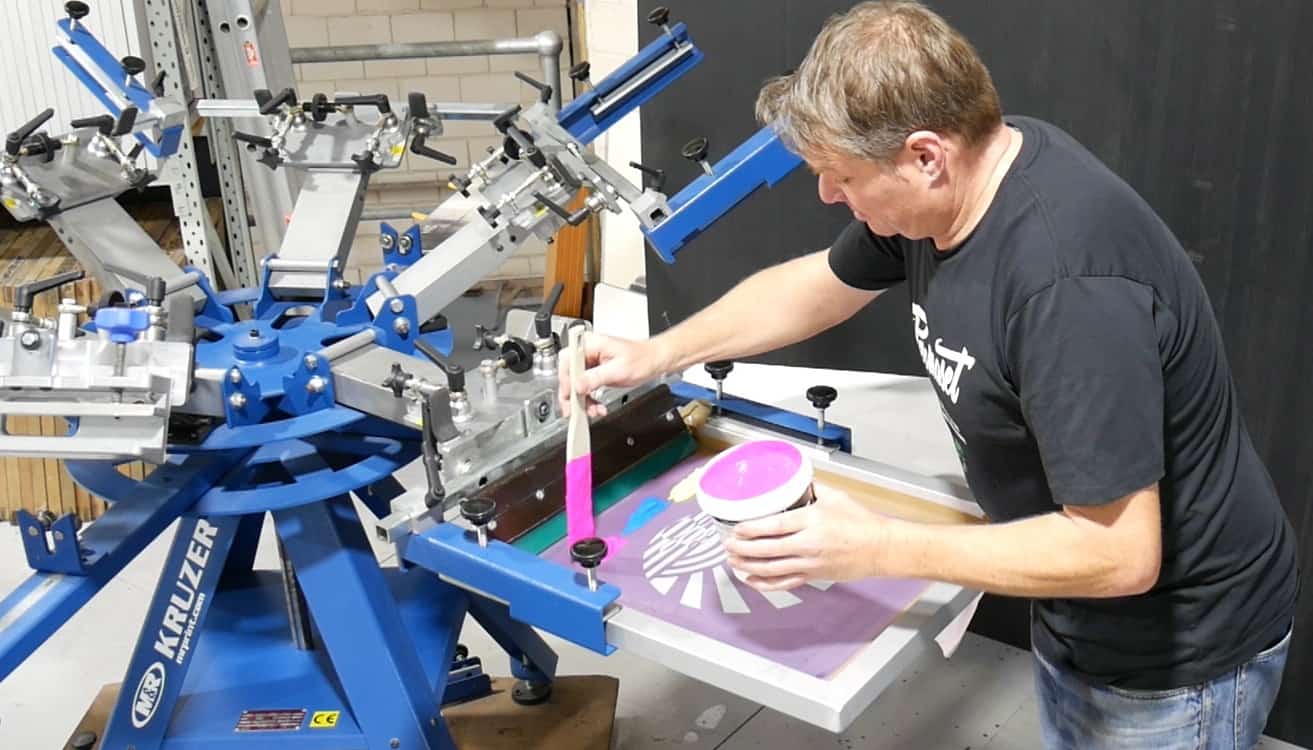
Now, line the screen up with where you want to print the image. Pour some of your ink across the top of the screen. Next, use the squeegee to smoothly transfer the ink down the screen and across the image. This is the part you need to practice, as it can be quite tricky getting all the ink onto the image area.
You need to push down fairly hard, and make sure you get all the ink in the right place. Now, you’re ready to remove the screen. Carefully remove the screen – and you have a t-shirt with your image printed on! Let it dry by leaving it hanging – some inks dry with 30 seconds in a hot oven – and that’s it done!
That’s screen printing the manual way, and it gives you a good idea of the process and what it involves. Now it’s time to look at screen printing machines, and how they can help make life a lot easier for the screen printer.
Check out the YouTube video below to see a 4 colour, 4 station screen printing machine in action!
So, we hope we’ve helped you find the right machine for you, and before we go, here are a few frequently asked questions that might be of help.
Frequently Asked Questions
What Can Be Screen Printed?
A large number of different fabrics can be screen printed, with the best results being on silk and wool, plus the right machine can print on wood, paper, glass, ceramics, metal plastic, leather and even electric circuit boards. If you want to print on bottles and mugs, you need the cylindrical machine.
What Sort of Lamp Do I Need?
You don’t need a special lamp, just a table lamp – preferably one that is adjustable – and a 250W bulb. Angle poise desk lamps do the best job and are the easiest to get in the right position.
What is Mesh Count?
The mesh screens used in screen printing come with various different mesh counts. This is the number of holes in a given area. If you want bold and brash images, a mesh count of 180 is the best, while for finer work, mesh counts can be anywhere between 230 to 355. Talk to your craft or printing supplier about what you want to do and they will advise you.
Is the Screen Easy to Clean?
Yes, it should clean with water, either with a hose or simply by pouring it on, and if you want to leave the image for later use, you can find specialist removing liquids that will do the job – talk to your print suppliers for more information.
How Should I Print the Black Image?
We recommend a laser printer for the best results, as they produce a very solid black image which is essential if you are to have a successful print run.
Happy Screen Printing!