We’re often asked for advice from both readers of the site and clients as to how to export projects from Cricut Design Space. The process is actually one of the easier tasks to do, regardless of your experience with the Cricut machine itself.
One way to make the best of Cricut Design Space is to export your projects to make them more workable on outside of the Design Space Sphere.
The most user-friendly of die-cutting machines, Cricut are fantastic models when working on projects requiring the cutting of vinyl, fabric, felt, apparel, and other material types.
However, what many people may not also realize is how well these models fair when it comes to exporting.
Here we offer a brief but informative guide to getting the best from all your imported projects by accessing Cricut’s Design Space.

Getting Started with Cricut Design Space
Cricut Design Space is an App where you can extend your creative projects by both designing and wirelessly cutting here. In short, it’s the area where all the creative magic happens before you finalize your completed project pieces!
Whether you prefer to start your very own project from scratch or utilize the vast collection of images and fonts stored in the Circuit library, this area allows all file types.
Then, once you’ve completed your project, you have the option to export your work to whether it needs to go next.
How to Export Projects from Cricut Design Space
- Sign in to your Cricut account.
- Find your project in the Design Space area. This is easily accessible on the left-hand side of the screen where a link to View All your projects is visible.
- Click on the View All link and select the project that you want to export.
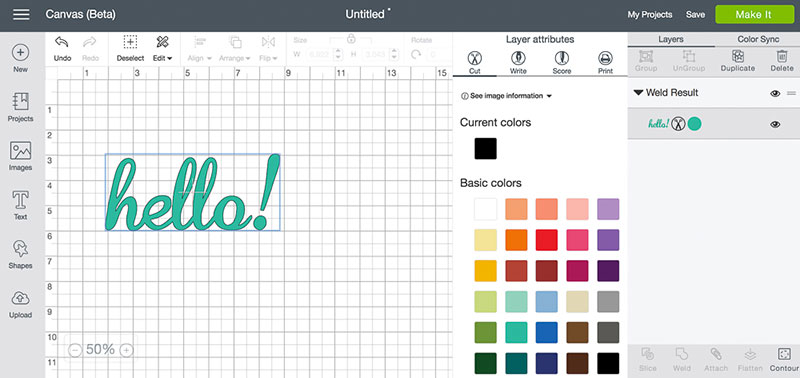
- In the left-hand corner, click the three lines visible next to the word Canvass to bring up a menu.
- From this menu, scroll down and select Settings.
- This offers you further design space settings where you’ll need to turn off the Canvass Grid
- Go into your Start menu on your computer folder and select or search for your Snipping Tool.
- Open your Snipping Tool up and pin it to your taskbar by right-clicking on it.
- In this snipping tool, select New and draw a box around your design that you want to export.
- This will take your project into its own dedicated snipping box where you can make final checks and edits.
- Here you can click SAVE, meaning this project can be exported to your computer desktop ready for sending elsewhere
- Once this has been saved, it will convert it to a jpeg, allowing you to use the project as a file, a printable option, or a sharable document that you can perhaps electronically share or email to clients or friends.
This method allows you to save your projects from your Design Space and effectively take them out of the Cricut Design Space to work on away from this software, and even on another program, ready for exporting to where you need them to go.
It is, however, important to note that though you can save your files on Cricut Design Space and make them public, these can’t be edited or changed by other users.
Therefore, when you export projects from Cricut Design Space instead, you make your projects available for extended use by other people for them to work on as they please outside of the Cricut Design Space area.